Table of Contents
ToggleErrors in levelling can be classified into three main categories:
- Personal Errors
- Errors Due to Natural Causes
- Instrumental Errors
i) Personal Errors
Personal errors arise from the mistakes made by the surveyor during the levelling process and include the following:
1. Sighting Errors
These occur when it becomes difficult to align the crosshairs with the staff graduations accurately. This may be due to factors like excessive distance between the instrument and the staff , the thickness of the crosshairs, or poor visibility conditions. Atmospheric factors such as haze or glare can also contribute to this issue. These errors are often accidental and can offset each other, making them compensatory in nature.
2. Errors in Manipulation
Manipulation errors occur due to improper handling or use of the levelling instrument. The following are common causes of such errors:
Careless Setup of the Instrument: The levelling instrument must be set up on stable ground and carefully adjusted to ensure accuracy. Once the instrument is in position, neither the telescope nor the tripod should be touched during the observation process, as any movement can lead to errors.
Imperfect Focusing of the Eyepiece and Objective: To prevent focusing errors, the eyepiece should be adjusted until the crosshairs are sharp and clear against a white background. Additionally, parallax (the apparent shift of the crosshairs relative to the staff) must be eliminated by properly focusing the objective lens before each reading.
Bubble Not Centered During Reading: The leveling bubble must be exactly centered before taking any readings. When the bubble is centered, the vertical axis of the instrument is properly aligned, making the telescope’s horizontal axis truly horizontal. If the bubble is off-center, the horizontal axis tilts, leading to inaccurate staff readings. This error becomes more significant over long distances. To prevent this, the surveyor should develop the habit of checking the bubble’s position both before and after taking each reading.
- Non-Verticality of the Staff: When a staff is not held perfectly vertical, it can result in inaccurate readings. This issue is especially common if there is no plumb bob attached to ensure proper alignment. When the staff tilts, the readings tend to be larger than the true value. The degree of error increases with the length of the staff, making the verticality check more critical for larger readings.
Impact of Inclination: If the staff is inclined, the reading will be exaggerated. The greater the angle of tilt, the larger the error, especially for higher readings. For smaller readings, the error is less noticeable. Therefore, it is essential to ensure the staff is vertical, particularly when dealing with large readings. The staff person can be instructed to slightly move the staff forward or backward until the minimum reading is observed.
Checking Verticality: The non-verticality of the staff in the transverse direction (perpendicular to the line of sight) can be checked using two vertical crosshairs on the instrument. If the staff is not vertical in this direction, the horizontal crosshair will not align parallel to the graduations on the staff.
When the staff is not held vertically, the error in the reading can be calculated using the following formula:
Error=AB(secθ−1)
where AB is the true vertical distance and θ is the angle of tilt. The greater the tilt angle, the larger the error in the reading.

3. Errors in Reading the Staff
Staff reading errors often occur due to inexperience, particularly among beginners. Common mistakes include:
Reading the Staff Upwards Instead of Downwards: The correct way to read the staff is from the bottom to the top, but beginners sometimes mistakenly read it in reverse, leading to incorrect measurements.
Reading the Top or Bottom Hair Instead of the Central Hair: The central crosshair should be used for readings, but confusion may arise, causing the observer to read against the top or bottom hair instead.
Misreading the Whole Metre: Sometimes, attention is focused too much on the decimal part of the reading, causing an incorrect interpretation of the whole metre value.
Misreading an Inverted Staff: If the staff is inverted (for example, during overhead readings) and is mistakenly read as if it were held vertically, it leads to significant errors in measurement.
4. Errors in Recording and Computation
Errors in recording and computation are often due to mistakes in entering or processing data. Common errors include:
Incorrect Column Entry: This happens when a foresight (F.S.) reading is mistakenly recorded in the intermediate sight (I.S.) or backsight (B.S.) column, or vice versa.
Digit Interchange: Sometimes, digits are accidentally swapped during recording, such as writing 1.239 instead of 1.932.
Omitting an Entry: Missing a reading entry can lead to gaps in the data, causing inaccuracies in the levelling calculations.
Mishearing or Misrecording the Reading: Errors may occur when the numerical value called out by the level operator is recorded incorrectly.
Omitting the Minus Sign for Inverted Staff Readings: If the staff is inverted during overhead readings, the negative sign must be included. Forgetting this leads to incorrect results.
Incorrect Arithmetic: Mistakes in basic arithmetic, such as adding a foresight (F.S.) reading instead of subtracting it, or subtracting a backsight (B.S.) reading instead of adding it, can significantly impact the final calculations.
ii) Errors Due to Natural Causes
Errors due to natural causes arise from environmental factors affecting levelling accuracy. These include:
1.Errors Due to Curvature
The curvature of the Earth’s surface causes the observed staff readings to be slightly higher than they would be on a perfectly flat surface. This is because the line of sight is straight, while the Earth’s surface is curved, resulting in a slight lowering of the station’s elevation relative to the observer.
Effect of Curvature: The error due to curvature increases with the square of the horizontal distance between the staff position and the observation point. This effect is typically small in ordinary levelling (e.g., only 0.003 meters for a sight length of 300 meters), but it should still be corrected for greater accuracy.
Curvature Correction Formula: To correct for curvature, the following formula is
Curvature Correction (Cc) = d^2 / (2R)
Where:
– d = horizontal distance between the staff and the level
– R = radius of the Earth (approximately 6,370 km)Approximation:
Cc = 0.0785 * d^2 (in meters, where d is in kilometers)
2. Errors Due to Refraction
Refraction impacts observed readings in a manner opposite to that of curvature. While curvature lowers the elevation of the station, refraction raises it. The error introduced by refraction is directly proportional to the square of the horizontal distance between the level and the station. For short distances, this error is negligible and is often disregarded in routine leveling.
However, refraction occurs because the line of sight, when passing through layers of air with varying densities, bends toward the Earth. This bending causes points to appear higher than their actual positions. Under normal atmospheric conditions, the effect of refraction can be approximated as an arc with a radius seven times that of the Earth. The refraction correction is always added to the staff readings, and its magnitude is 1/7th of the curvature effect, but in the opposite direction.
To calculate the correction for refraction, the following formula is used:
Cr = (1/7) * (d^2 / 2R) = 0.0112 * d^2
where d is the distance in kilometers.
The combined correction for both curvature and refraction is given by:
Combined_correction = (6 * d^2) / (7 * 2R) = 0.0673 * d^2
For practical purposes, this error is typically small enough to be ignored over short distances. However, to minimize its impact over longer distances, the error can be reduced by balancing back sight and fore sight distances or using the method of reciprocal leveling.
3. Errors Due to Wind and Sun
Strong winds make it challenging to maintain the staff in a perfectly vertical position, leading to errors in observed readings due to the staff’s non-verticality. Additionally, the wind can cause vibrations in the instrument, preventing the bubble in the level tube from staying centered. During high winds, it is advisable to pause the work, use an umbrella to shield the level, and aim to keep the staff readings minimal to reduce potential errors.
Sunlight can also interfere with the process, particularly when it shines directly on the objective glass of the instrument. To mitigate this, it is recommended to protect the instrument with an umbrella. Moreover, temperature changes caused by the sun may slightly affect the length of the leveling staff. However, in standard leveling operations, this change in length is generally negligible.
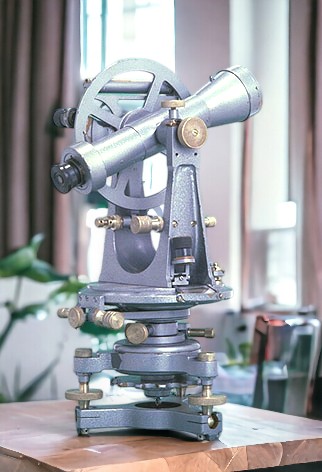
iii) Instrument Errors
Instrumental errors arise due to several factors,some are:
1. Imperfect Adjustment of the Level
In a perfectly adjusted level, the line of collimation remains horizontal when the bubble in the level tube is centered. However, if the level is not properly adjusted, the line of collimation may become inclined, either upward or downward. This results in observed readings being either too high or too low.
These errors can be compensated for by ensuring that the back sight and fore sight distances are equal, as in the process of fly-levelling. However, in cases involving intermediate sights, where the distances vary significantly, the readings are thrown off by different amounts. On steep slopes, where the back sight distances are usually longer or shorter than the fore sight distances, these errors accumulate, leading to even greater inaccuracies.
Errors resulting from improper adjustment are both common and significant. Therefore, it is crucial to regularly test and adjust the level before each use. Additionally, care should be taken to ensure that the back sight and fore sight distances remain equal during the levelling process.
2. Imperfect Adjustment of the Level
A defective level tube can introduce significant errors into levelling work. If the bubble within the tube is sluggish, it may stay centered even when the bubble axis is not truly horizontal, leading to inaccurate readings. Conversely, if the bubble is overly sensitive, a great deal of time may be required to accurately center it.
Another potential issue is irregular curvature in the tube, which can cause similar inaccuracies. Fortunately, the impact of a defective level tube can be minimized if the back sight and fore sight distances are kept equal, as this helps neutralize the error.
3. Shaky Tripod
A shaky tripod can cause the instrument to become unstable, leading to inaccurate readings and wasted time while attempting to make precise observations. To prevent this, it is essential to ensure that every bolt, nut, and screw on the tripod, including the screws of the foot shoes, is properly tightened before starting any observations.
A simple method to check the stability of the tripod is to twist one of its legs after taking a staff reading and then release it. If the reading changes after releasing the leg, this indicates that the tripod is unstable and adjustments should be made.
4. Incorrect Graduations of the Staff
Errors can arise if the graduations on a staff are not accurate. In routine levelling, this error is often negligible, as readings are typically recorded with a precision of around 0.005 m. However, for precise levelling applications, it is crucial to ensure the accuracy of the graduations. This can be achieved by comparing the staff graduations against an invar tape using magnification to identify any discrepancies.